Wings for dun flies tied with CDC

Wings for dun flies tied with CDC can be made in different ways. CDC feathers are highly appreciate for dun flies because this material is more appropriate to imitate better insects in dun stage.
yellow-duns tied by Lucian Vasies

The wings can be tied in Fratnic style, practically the simplest way to make them. Also this method is the most used way. In my opinion is great for sedge flies and very small terrestrial insects and midges. Unfortunately I had a lot of flies refused because the wand and the position on the water was not the best for those moments

yellow-dun-fly-tied--using-Fratnic-style-by-Lucian-Vasies

Another way is developed in Slovakia, Czech Republic and Poland : 2 or 3 turns of dubbing behind the wing.The result: a nice and balanced torax with cripple legs. The wing will stay more erect in this way and will be very close to the natural look of the insects. This way of tying is one of the best in my opinion! In Autumn period when grayling is feeding in frenzy, the flies tied using this style were very efficient.

yellow dun tied using Slovak style by Lucian Vasies

Of course is another simple variant, probably the best for small and very small flies. If you cast over 8-10m, a fly tied on size #18-22 is difficult to be observed. So using a different tying technique will make the fly more easy to be noticed on the water and a great thing is that the wing will stay up no mater how many fish will catch.

yellow-dun-fly-tied--using-Slovak-style-by-Lucian-Vasies

I like a lost the last way of tying because the wing is more spread and the fly is more balanced than others:
dun-fly-tied-with-spread-CDC-wing

Materials used:

Hooks: Maruto Dohitomi D04 in size 16, 18, 20
Thread: UTC 70 Denier and Uni 17/0
Body: Condor Substitute from Devaux in yellow color
Tail: Coq de Leon feathers
Torax: Mad Rabbit Dubbing in yellow
Wing : Troutline Ultra Selected CDC in tan color

I wrote a detailed article about tying the same fly using 3 different techniques of using CDC for making wings here on Globalflyfisher

Tie Better your flies no.2 – biots and herls for bodies

“Tie Better your flies no.2 – biots and herls for bodies” is the second article dedicated for beginners. It is about biots and herls used with great results by some tiers but not so used and appreciated like should be by the mass of fly tiers.
On the market you’ll find different types of biots. Based on my knowledge, in fly tying world the most rare biots and herls are from condor eagle and harpy eagle. Those who have a few feathers from these birds are very lucky because these birds are world wide protected. These biots and herls are appreciated because are very long and wide compared with others. For this reason we replace them with feathers from big parrots, peacock, swam, pelican, heron and so on. Most used biots are from turkey also sold as a condor substitute. Goose biots an duck biots are used also but especially for tails or making small bodies or legs for realistic flies.
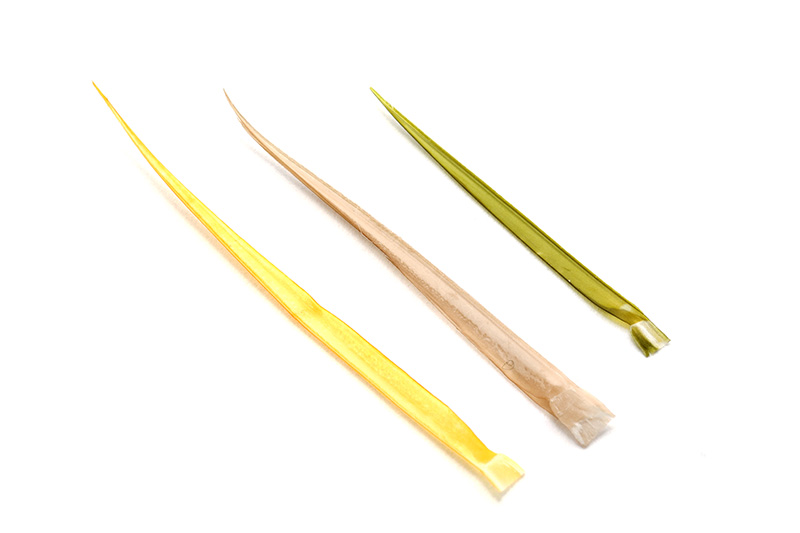
Bellow is a photo with 3 biots from 3 types of birds that I like to use. Unfortunately I never had the chance to use condor biots to show you how they looks. A great french tier : Jean Paul Dessaigne used this material on his website: http://www.jpdessaigne.com/
Yellow one is from Devaux (they keep a secret about the origin of these feathers).
Cream is from Peacock male.
Olive is from Turkey.

step-1-flytying.ro-different-types-of-biots by Lucian Vasies

For beginners in tying: biots are those barbs from primal feathers.These barbs are situated on the front part of these feathers and are positioned in angle compared with the stem and are more wider and stronger than other type of barbs. On the opposite part of the stem you will find long nice barbs, perfect for making bodies and are called also herls. Compared with other barbs from other feathers biots and hears from primal feathers are stiffer, longer, wider and are different in structure regarding translucency: one half is more opaque than other part.

step-2-flytying.ro-Devaux-Biot by Lucian Vasies

step-3-flytying.ro-a-closer-photo-for-Devaux-biot by Lucian Vasies

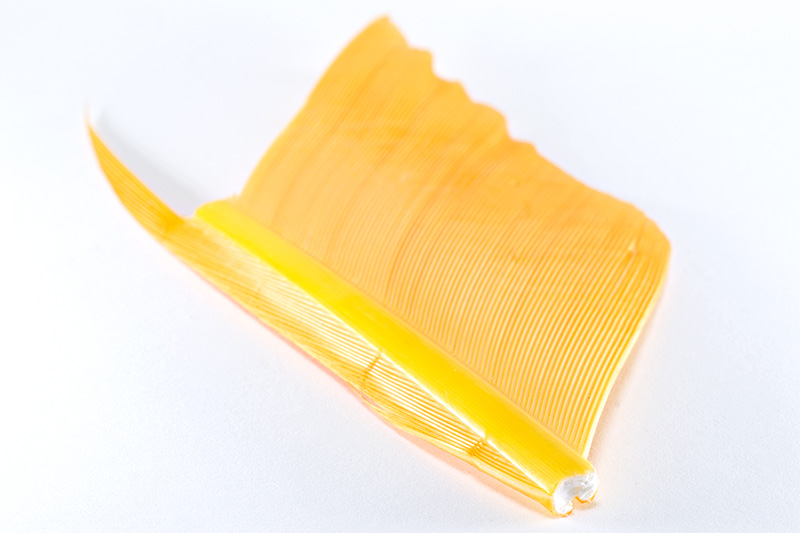
In these photos I used biots from Mouche Devaux Champagnole France called Devaux Condor Substitute. These are the best from what I used and I really enjoy tying with these feathers. Those feathers are sold in segments and contain plenty of long barbs/herls and long biots. Are hand selected and hand dyed.

Now lets talk a little bit about structure of the barbs and what is important for a tier:

-When we make a body we are looking for consistency in order to obtain a nice segmentation. Herls and biots will give you the possibility to make long and nice bodies. Also  due the special structure and transparency will give you nice and interesting colors in gradient tones.

The difference between a herl and a biot is that a biot will  let you to  make a better and more evident body segmentation but not very long.  The herl type will let  you to make longer bodies but the segmentation is not so evident compared with a body made of  biot.

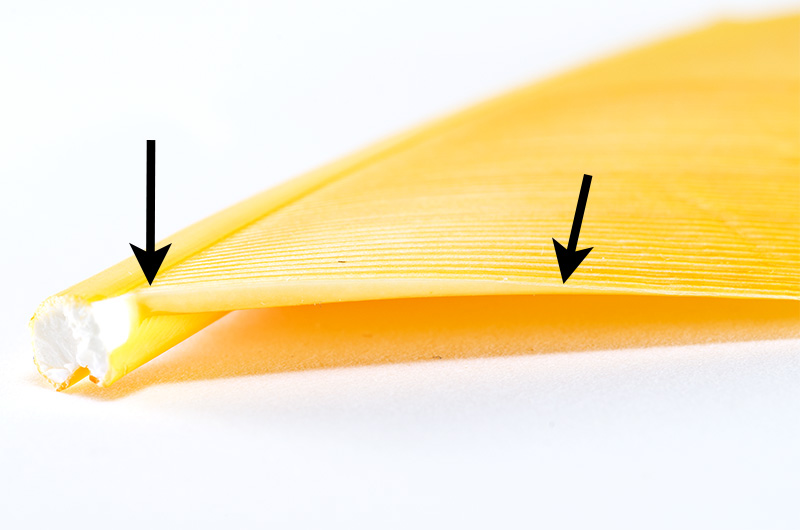
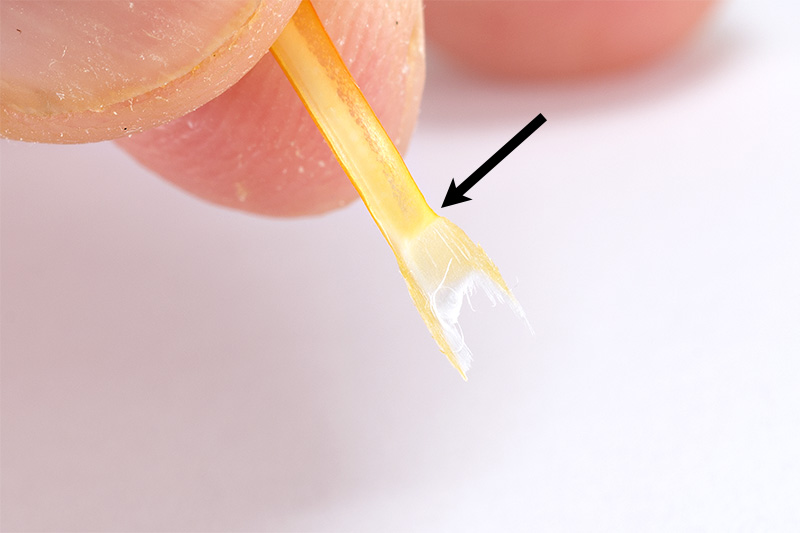
– for example you can see bellow that the good part of the barb is  the zone between  those 2 black arrows. The rest of it is not good,  only for fixing with thread.

step-4-flytying.ro-active-part-of-a-biot by Lucian Vasies

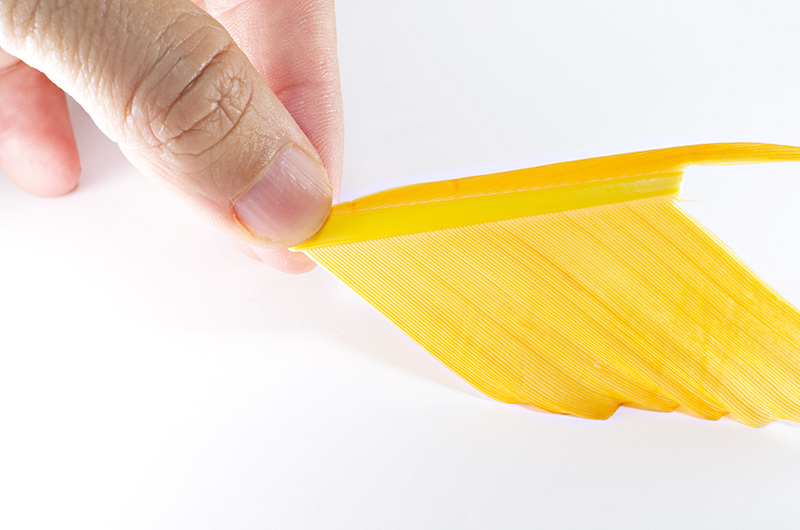
– in the case of a a biot the shape is triangular and the wider part is more longer compared with a classic barb:
step-1-flytying.ro-different-types-of-biots by Lucian Vasies

So in a lot of situations a biot is better than a herl. If the feather is big  like these ones from Devaux you can do the same body with the herl and the biot because these  barbs are wider compared with others.

Tying with  herls and biots:

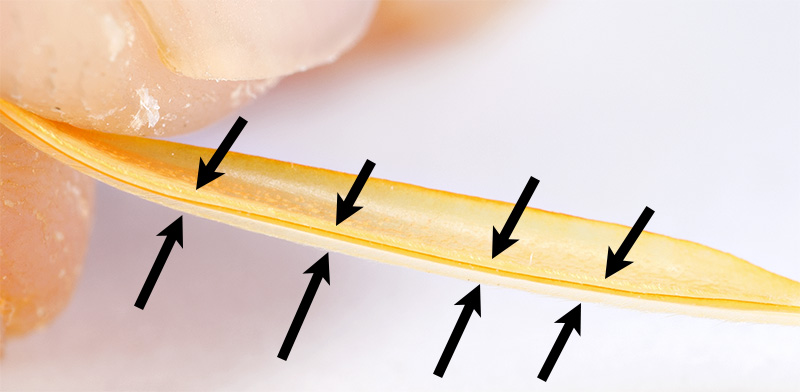
-when you strip the barb from the stem of the feather you will notice that the structure is not symmetrical. The base is transparent and the upper part is more opaque. Also  you’ll see a small gap at the base . This gap is a reference for us  in tying process.

step-5-flytying.ro-how-looks-closer-a-biot by Lucian Vasies

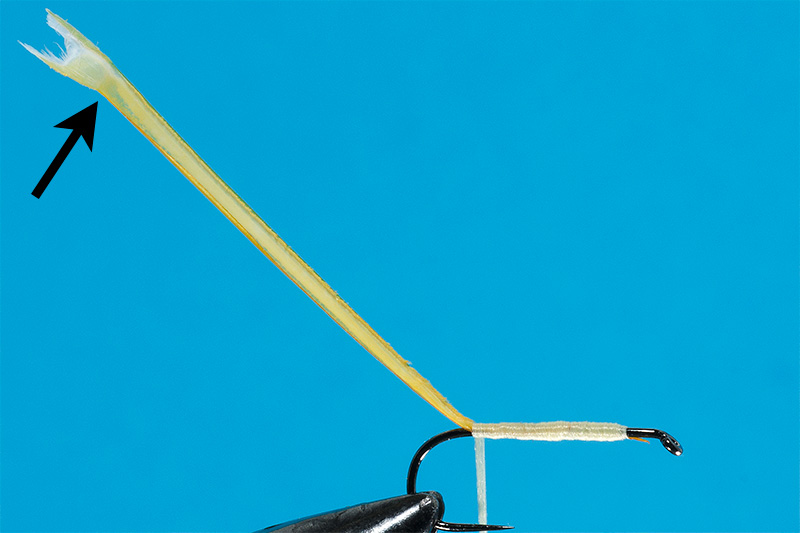
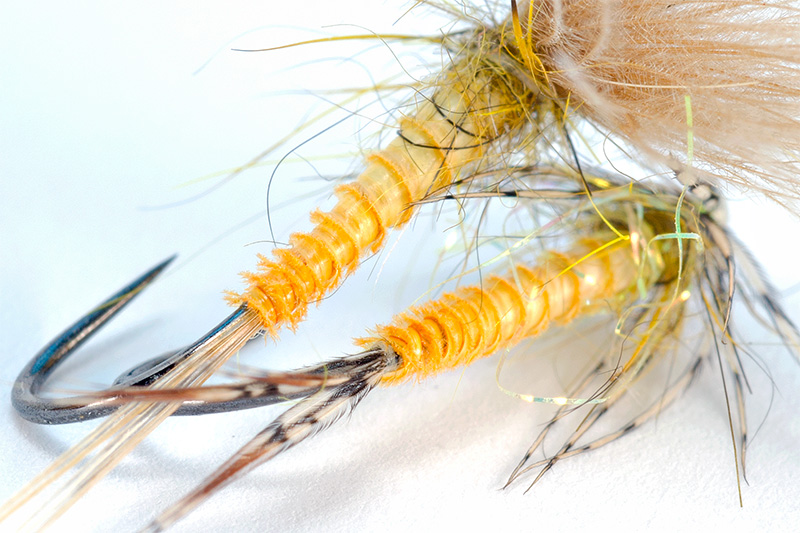
The opposite part of the gap is not so transparent and in section has a “T” shape. The barb has a small fin/burr. This fin will provide you a very nice segmentation and you can see it in the photo bellow between arrows:
step-5-flytying.ro-the-T-side-of-biot by Lucian Vasies

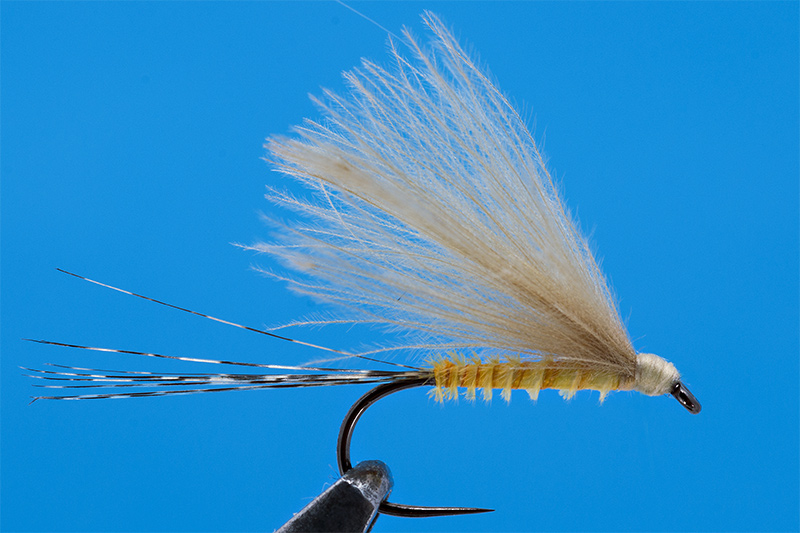
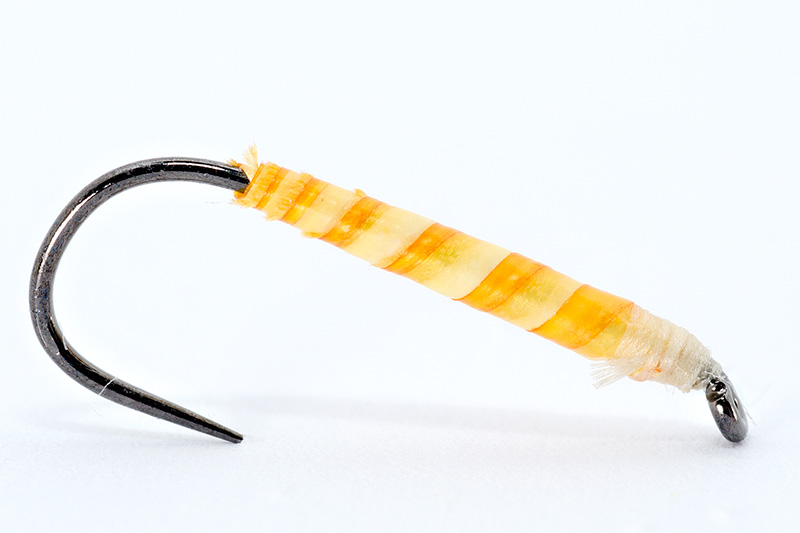
Now here is a body made with a biot with the gap fixed  down. At the first turn the gap will be orientated  up.

step-6-flytying.ro-fixing-the-biot-on-the-hook-shank  by Lucian Vasies

The body will look like this:

step-7-flytying.ro-body-with-biot by Lucian Vasies

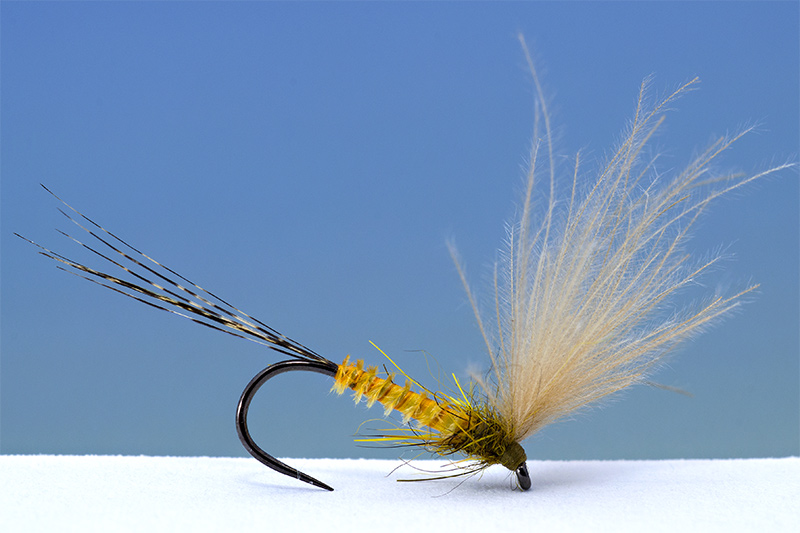
In the photo the turns are closer and you can see it very well the body. If you make a rare turns, the body of the fly will look like this one bellow:
step-8-flytying.ro-wide-steps Lucian Vasies

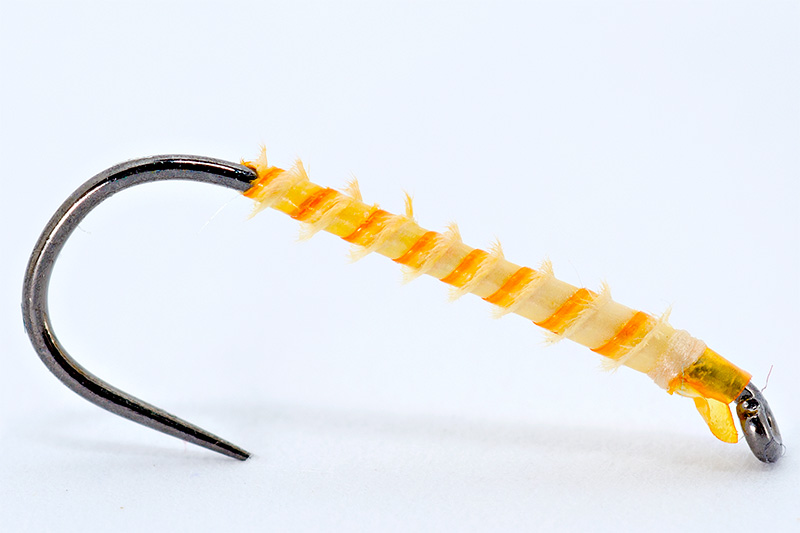
This type of body is great for midges and very small and delicate flies. Also the colors are very nice and you can see how beautiful are the tones of the body. Perfect for buzzers and emergers!

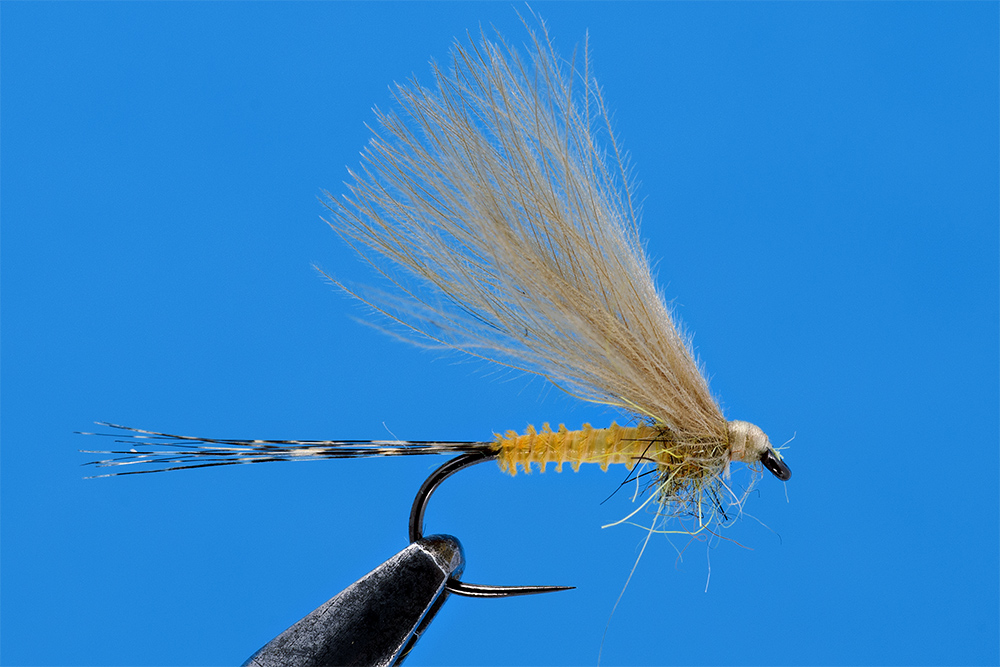
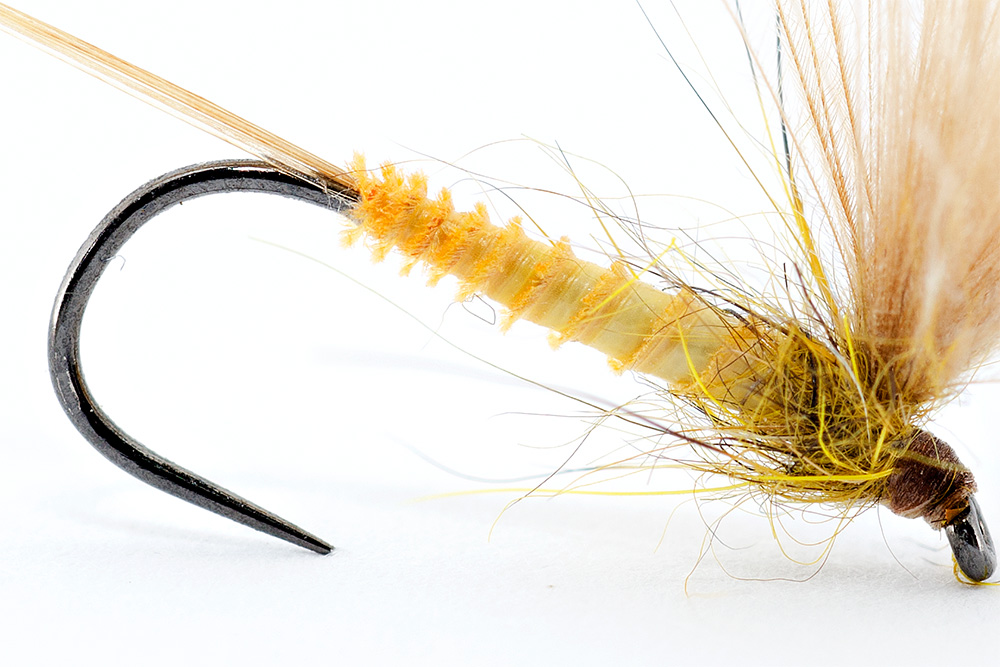
Another way to tie a body is to fix the barb with the gap in the upper position, after first turn the gap will be orientated down and the fly will look smooth like in the photo bellow:

step-9-flytying.ro-slim-body Lucian Vasies
More closer in imitation to dun flies, spinners and mayflies.

I prefer to work with this material instead of others ( peacock quill for example ) because you can tie bodies very easy and fast even on hooks in size #12 and #10. The material is very resistant and can be colored like you want.
step-10-flytying.ro-bodies-with-biot Lucian Vasies

body-fly-tied-with-biot by Lucian Vasies

if you have questions feel free to ask :)

cheers
Lucian

A simple thing

Back to fly tying desk :) Moving in other country for a period of time and having a second baby  is time consuming. I’m very anxious to gout for fishing  on river Adda here in Lombardia  it is raining a lot and  all the rivers from this area are ugly.

So  sometime staying in house, go out with children, making bread for fun and watching  the beautiful green-yellow- brownish leafs falling down from the trees gives you ideas hot to tie easy and fast and improve flies. This morning an idea about tying a CDC fly comes through my head: “why don’t you make an X with thread under the hackle? In this way you’ll spread nicely the CDC barbs and the silhouette of the fly will be very clear for the fish. Beside that the fly can by tied  on small hooks  very easy, can be  cast  a present easy on the water, only nice things!

My friend here is my idea and I’m sure that you’ll like it :)

Materials used: Maruto D04 #12-18

Thread: I prefer Uni 17/0 but any  thin thread can be used

Tail: Coq de Leon Indio in light brown- dun color

Body: body hearl or condor substitute in different colors to match the hatch

Hackle: Ultra Selected CDC  from Trout Line in natural tan color

Lets start:

I prefer to use a dubbing loop for CDC because in this way  the CDC barbs will be more dense and will sit nicely on the hook shank. More than that is used with hackle only a small length of the hook shank. Using the entire feather you’ll use  a big part of hook shank for making the hackle because the stem of the feather is not very slim.


You can see how I make the “8” shape with the thread and I spread the barbs on the sides

I hope that I can give you a nice burst for sit down and tie a few flies like this one :)

cheers,

Lucian


Hot Spots

Usually a hot spot is applied behind the bead or behind the eye of the hook. In rivers with a high nymphing pressure like in Eastern Europe, the classic nymph with a classic hot spot fails. In this situation if the fisherman uses the same pattern with a different position of the hot spot he will succeed in catching grayling and trout. The most common color for hot spot is orange. From my experience, red is a great color also ( especially for trout ), chartreuse for both species, and pink and violet for grayling.

UV colors are also great for hot spots.

The name of the thread that I used for  tying the nymphs bellow is Demmon. In my opinion it is the best thread that I have found until now. Demmon thread is very strong and very resistant  at abrasion with parallel semi bonded filaments.

Happy tying :)


Peacock quill – How to use it

When talking about peacock quill everyone thinks about the stripped barbs of the feathers from the peacock’s tail. Everyone expects it to be wide, nicely colored, gradually from white to dark grey, with a glossy look as if it were waxed. The peacock quill is used because it imitates very good the abdominal part of the dry flies and emergers.
The problem is that a quill of high quality can’t be found anywhere in the feather but only in the area of the eye of the feather. Even so, good feathers are from peacocks older than 5 years. The young ones have thinner feathers and the quill is not so brightly colored.
You can see in the picture below how to get this quill easily:

If you need to tie a large quantity of flies and you’re not in the mood to clear off the fine puff from the barbs with the rubber, there are stripped feathers for sale. To obtain the stripped quills a chemical solution is needed, more exactly sodium hypochlorite. This solution burns the puff but it will also slightly affects the quill. For this reason it becomes more sensible and breaks more easyly if the tier is not too careful.

An important advice: always fix the bottom of the quill and not the tip. The tip is more delicate and doesn’t have the needed colors, the hues are not so strong and won’t create the desirable contrast.

The barbs have a natural bent.Each of them are slightly bent towards the eye. It is important to know that the external side of the barb is nicely colored, glossy  and the inner side is more white, softer and more fragile.

In the photos below the barb is fixed at its bottom so that the external, glossy side of it appears on the exterior.

Here appears the texture of the body dependent on which side of the quill I used.

If the other side of the quill is used on the exterior, it will be more fragile and breakable. Thin cracks can immediately be seen.

To increase the durability of the fly, before making the body put a drop of head cement on the shank of the hook.

Here are the catchy outcomes.

happy tying :)

Vosseler Xpert fly tying Tool Clip – how to use it

One material that I like very much to work with is  the CDC. On the market you’ll find a lot of tools that  help you work with Cul de Canard feathers.  I worked with a lot of models and types: PetitJean clips, paper clips,foam blocks  etc. but the best seems to be the Vosseler Xpert Tool Clip. I  tried this tool right  after visiting a fishing exposition. I saw this tool in the hands of a great German fly tier. He used it very easy, fast and without wasting  material.

The tool has 3 grip levels

Fixing the feathers

Cutting the barbs

Grip down the barbs

Forming a hackle loop:

Working with marabou:

Working with deer hair:

Here you can see a very good grip even for a lot of hair:

Increase the visibility for small flies

A simple and very efficient method to increase the visibility for small CDC dry flies tied on #16-22 : adding a small bunch of white CDC barbs in front of the wing.
In certain cases I use yellow or pink instead of white, especially at sunset when the light and the shadows become metallic.


Here is the step by step:

making the body of the fly


Materials for this fly:

Hook: Maruto Dohitomi D04 BL #16

Thread: 70Denier Olive

Body: Devaux yellow thread for bodies

Tail: coq de leon indio claro

Torax: mad rabbit dubbing

Wing: CDC Khaki Campbell feathers

Hi-Vis: white CDC barbs tied in front of the wing